Thursday, June 4, 2015

S'sK 2 layer Strawberry Blueberry Whipped Cream Cake


2 layer Strawberry Blueberry Whipped Cream Cake


Ingredients:
1. Funfetti Cake
Funfetti Cake Mix
1 cup water
1/2 cup canola oil
3 whole eggs

2. Fresh Fruit
Strawberries
Blueberries

3. Whipped Cream Frosting
1 Quart Heavy Whipping Cream
2 cups powdered sugar
2 teaspoons vanilla extract

Step 1: Cake, washing fruit, and making whipped cream
1. Make Funfetti whole egg recipe cake following the instructions on the box. I bake 2, 8-inch round cakes with one package of Funfetti. My bake time is about 30 minutes. After baking, set aside to cool.


2. Wash fresh fruit.
3. Cut strawberries into little pieces. Set aside.

4. Make whipped cream.
a. Add heavy whipping cream to large bowl.
b. Add powdered sugar and vanilla extract to the whipping cream.
c. Beat whipping cream until it firms up and becomes a thick whipped cream. It usually takes me about 5-10 minutes of beating the cream on medium with a whisk attachment.


Step 2: Cake Assembly
1. Use a sharp cake knife to flatten the top of each of the 2 cakes.
2. Put first cake on a cake plate.

3. Add a layer of whipped cream frosting to the top of the first cake.

4. Add strawberries and blueberries on top of the whipped cream frosting.


5. Add second cake on top of strawberries and blueberries layer. Make sure to add the flat side down.


6. Add frosting to the top and sides of the cake. I use a squeegee.

7. Decorate top of cake with strawberries and blueberries.

8. Refrigerate cake immediately.
9. Store cake in an air-tight cake container in the refrigerator. Cake will last about 3 days (no preservatives).


Friday, May 22, 2015

S'sK Egg Bread Rolls


S'sK Egg Bread Rolls

*An original recipe by Sebastian's Kitchen 

Ingredients:
2 cups warm water
3 1/2 teaspoons active dry yeast
1 tablespoon white sugar
2 teaspoons salt
2 large eggs
5 1/2 cups bread flour

3 tablespoons butter, melted

Bonus items:
Parchment paper

1.    Add cold water into microwave safe bowl. (I use a glass microwave safe Pyrex measuring cup). Microwave water for about 1 minute until warm. Add water to a large bowl. Water should be warmer than lukewarm, but not hot enough to burn you.

2.    Add yeast, sugar, salt, and 2 eggs to water and stir with a fork to dissolve.
3.    Cover yeast bowl with plastic wrap and let yeast bowl sit in a nested bowl or Tupperware container with hot water.
    a.    To make a nested bowl with hot water:
          i.      I use a large Tupperware container and fill it about half way up with hot water.
          ii.      Nest the yeast bowl in the Tupperware container.
          iii.      Water should be hot, but not hot enough to burn you.
          iv.      Remove yeast bowl from nested bath when kneading.
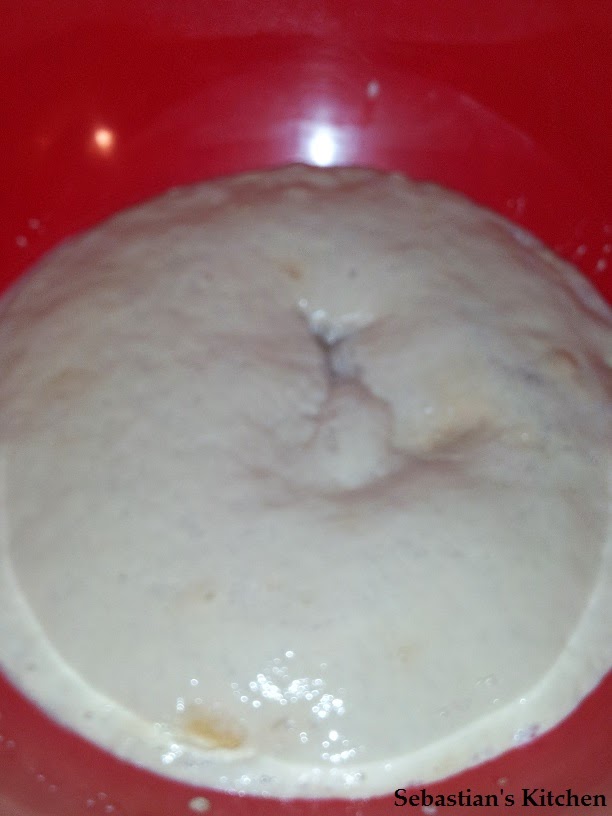
  b.    Let yeast sit in nested bath for 10 minutes. You will notice that your yeast water has become very thick, bubbly, and frothy. This is perfect. Remove bowl from nested bath and remove plastic wrap top.
  c.    If your bowl is not frothy, try again. There are many factors that could affect this. Most likely your yeast died or was not fresh to begin with.

4.    Add bread flour slowly. Mix with fork until difficult to mix. Knead dough with hands for a couple minutes until dough has absorbed all flour.
   a.    The dough should be slightly sticky to the touch, not dried out, or too wet.

5.    Cover bowl with plastic wrap.
6.    Let sit on counter in a nested bowl with hot water (just like before) for 1 hour.


7.    Remove dough bowl from nested bowl.
8.    Empty water bowl.
9.    Remove plastic wrap from bowl.
10.    Start separating dough into 8-10 medium sized balls.
11.    Line 2 baking sheets with parchment paper.
12.    Start preheating oven to 350 degrees F.
13.    Place dough on parchment paper.
14.    Once oven is preheated, set baking sheets in the oven.
15.    Round 1 of baking - bake rolls for 10 minutes.
16.    At the 8 minute mark, add butter to microwave.
    a.    In a microwave safe bowl, melt butter until just barely melted, (do not let it bubble/boil in the microwave).

17.    Once the first round of baking the rolls are up, remove the bread from the oven and brush top and sides of bread with butter.  

    a.    I use a silicon cooking brush to spread the melted butter on. It works really well.


18.    Continue baking for 20 – 30 minutes or until done baking. (Oven times will vary depending on your oven and on how thick you made your rolls).
    a.    Bread will be done when it is firm and slightly golden.
19.    Remove bread from oven and turn off oven when bread is done baking.
20.    Store leftover bread in an air-tight container in the refrigerator.

Buttery Apple Cinnamon Bread adapted from Rae Gun Ramblings


This recipe is adapted from: Rae Gun Ramblings Cinnaburst Bread, click on the link and check her website out!

I originally found this recipe on Eat Cake For Dinner's website: click on the link and check her website out! She adapted her version from Rae's original recipe. Just giving credit where it's due. :)

What I changed: changed 1 cup milk to 1 cup water, added a specific amount of flour. See the note below about bread flour or all purpose flour, added my recipe for cinnamon butter flavoring, and added 2 Granny Smith apples.

Special Flour Note*
You can use all purpose flour instead of bread flour - if you do, make it 6 cups of all purpose flour instead of 5. I've made this recipe both ways and they are both fantastic.
When mixing the ingredients, you'll notice that the dough is still wet, don't add too much flour or the bread will be very dense, we want a light airy fluffy consistency, so don't worry about the batter being wet!

I use 2 bread loaf pans and 1 square 8x8 glass pyrex bakeware to bake this recipe in. If you just use 2 bread loaf pans, you may find that the amount of dough is so plentiful that it overflows out of the pan when you bake it and you'll get butter cinnamon and apples all over the bottom of your oven burning. 


**************************************************************************

Apple Cinnamon Bread

Ingredients:
2 cups warm water
2 1/4 teaspoons bread machine yeast
1/3 cup white granulated sugar
1/3 cup canola oil
1 large egg
1 1/2 teaspoons salt
5 cups bread flour


2 Granny Smith apples, peeled and cubed
 
Cinnamon Butter Mixture:
8 tablespoons butter
1 tablespoon cinnamon
1/2 cup white sugar


Step 1: Bread dough

A. Measure water. Pour into microwave safe container. Microwave water for 40 seconds until warm. Water should be warm, not hot. Add water to large bowl.
B. Add yeast and sugar into large bowl and stir until dissolved, let sit 10 minutes. Yeast should look frothy and bubbly. It should smell like bread.
C. Add canola oil, 1 egg, and salt to bowl. Stir well.
D. Add flour 2 cups at a time stirring with a fork until batter becomes a wet, sticky dough.

E. Cover with plastic wrap and let sit in a warm place for 1 hour.

F. I use a bird bath to keep the dough warm.
           i.      Add hot water to a large tupperware container or bowl.
           ii.      Nest the mixing bowl into the tupperware bowl and let the heat of the water warm the bottom of the mixing bowl from the outside.


G. Let sit for 1 hour. Dough will rise.


Step 2: Cinnamon butter spread and apples Prep

A. Peel and cube apples. Set aside.
B. Melt butter in microwave for 10 to 15 seconds until liquid.    
C. Add cinnamon and sugar to butter and stir.
 

Step 3: Putting it together:

A. Preheat oven to 350 degrees F.
B. Butter inside of bread loaf pans and glass pyrex bakeware.
C. Divide batter into three equal parts and put them in your bread loaf pans/pyrex bakeware.
D. Add cinnamon butter mixture to bread dough.
E. Add cubed apples to dough.
F. Knead and fold dough inside pan to distribute apples and cinnamon butter mixture evenly.
   a. Dough will be very wet now.


G. Bake for 40 minutes to 1 hour. Bread should be slightly golden brown.
H.  Store in an air-tight container in the refrigerator.
I. When eating after bread has cooled and was refrigerated. Slice bread, then microwave it for 10-20 seconds to soften and warm bread. It will taste 100 times better!


Wednesday, January 28, 2015

Easy White Bread Rolls


S'sK Easy White Bread Rolls

Ingredients:
2 cups warm water
3 1/2 teaspoons active dry yeast
1 tablespoon white sugar
2 teaspoons salt
5 1/2 cups bread flour
3 tablespoons butter, melted

Bonus items:
Parchment paper

1.    Add cold water into microwave safe bowl. (I use a glass microwave safe Pyrex measuring cup). Microwave water for about 1 minute until warm. Add water to a large bowl. Water should be warmer than lukewarm, but not hot enough to burn you.

2.    Add yeast, sugar, and salt to water and stir with a fork to dissolve.
3.    Cover yeast bowl with plastic wrap and let yeast bowl sit in a nested bowl or Tupperware container with hot water.
    a.    To make a nested bowl with hot water:
          i.      I use a large Tupperware container and fill it about half way up with hot water.
          ii.      Nest the yeast bowl in the Tupperware container.
          iii.      Water should be hot, but not hot enough to burn you.
          iv.      Remove yeast bowl from nested bath when kneading.
  b.    Let yeast sit in nested bath for 10 minutes. You will notice that your yeast water has become very thick, bubbly, and frothy. This is perfect. Remove bowl from nested bath and remove plastic wrap top.
  c.    If your bowl is not frothy, try again. There are many factors that could affect this. Most likely your yeast died or was not fresh to begin with.

4.    Add bread flour slowly. Mix with fork until difficult to mix. Knead dough with hands for a couple minutes until dough has absorbed all flour.
   a.    The dough should be slightly sticky to the touch, not dried out, or too wet.

5.    Cover bowl with plastic wrap.
6.    Let sit on counter in a nested bowl with hot water (just like before) for 1 hour.


7.    Remove dough bowl from nested bowl.
8.    Empty water bowl.
9.    Remove plastic wrap from bowl.
10.    Start separating dough into 8-10 medium sized balls.
11.    Line 2 baking sheets with parchment paper.
12.    Start preheating oven to 350 degrees F.
13.    Place dough on parchment paper.
14.    Once oven is preheated, set baking sheets in the oven.
15.    Round 1 of baking - bake rolls for 10 minutes.
16.    At the 8 minute mark, add butter to microwave.
    a.    In a microwave safe bowl, melt butter until just barely melted, (do not let it bubble/boil in the microwave).

17.    Once the first round of baking the rolls are up, remove the bread from the oven and brush top and sides of bread with butter.  

    a.    I use a silicon cooking brush to spread the melted butter on. It works really well.


18.    Continue baking for 20 – 30 minutes or until done baking. (Oven times will vary depending on your oven and on how thick you made your rolls).
    a.    Bread will be done when it is firm and slightly golden.
19.    Remove bread from oven and turn off oven when bread is done baking.
20.    Store leftover bread in an air-tight container in the refrigerator.

Tuesday, December 9, 2014

Pie Crust and Empanada Dough Recipe

I wanted to share the recipe that I use for Pie Crust and Empanada Dough. It's the Butter Pie Crust Recipe from the Land O'Lakes Website: http://www.landolakes.com/recipe/2092/butter-pie-crust

I'm reposting just the ingredients on my blog for my convenience. Please click on their link and learn how to make this pie crust. It also works great for empanada dough.

Just a quick note about making empanadas.
1. Remember to use parchment paper on your baking sheet.
2. Once you finish assembling your empanada remember to brush egg wash on top of the empanada to give it a golden top.

I doubled their recipe for my convenience. This recipe makes enough pie crust for two pies.

Ingredients:

4 cups all-purpose flour
1/2 teaspoon salt
1 1/3 cup cold salted butter
8 to 10 tablespoons cold water

Wednesday, June 11, 2014

S'sK Plain Bagel Recipe

This recipe makes a lot of bagels. I make about 15 large bagels with this recipe. These bagels last only a few days, but I freeze half of the batch, that way I can eat one batch fresh and then take the second batch out of the freezer and put it in the refrigerator to thaw.


S'sK Plain Bagel Recipe

Ingredients:
3 cups water
3 tablespoons white sugar
4 teaspoons active dry yeast
3 teaspoons salt
8 1/2 - 9 cups bread flour

Bonus items:
Parchment paper
 

Instructions:

1.       Add cold water to microwave safe bowl. Microwave water for about 45 seconds until warm. Add water to a large bowl. (Water should be warmer than lukewarm, but not hot enough to burn you.)
2.       Add sugar and yeast to water and stir with a fork to dissolve.
3.       Cover yeast bowl with plastic wrap and let yeast bowl sit in a nested bowl or Tupperware container with hot water.
a.       To make a nested bowl with hot water:
                                                   i.      I use a large Tupperware container and fill it about half way up with hot water.
                                                 ii.      Nest the yeast bowl in the Tupperware container.
                                                iii.      Water should be hot, but not hot enough to burn you.
                                               iv.      (Remove yeast bowl from nested bath when kneading)
b.      Let yeast sit in nested bath for 10 minutes. You will notice that your yeast water has become very thick, bubbly, and frothy. This is perfect. Remove bowl from nested bath and remove plastic wrap top.


c.       If your bowl is not frothy, try again. There are many factors that could affect this. Most likely your yeast died. Either your initial water was too hot and it killed your yeast, or your environment was too cold so the yeast did not wake up and begin feeding. Another possibility is that your yeast was dead to begin with. Make sure you use fresh yeast that has been stored properly - as yeast does go bad.

4.       Add salt to the yeast water. Whisk with fork until well mixed.
5.       Add bread flour slowly. Mix with fork until difficult to mix. Knead dough with hands for a couple minutes until dough has absorbed all flour.
a.       Don’t add too much flour that the dough cannot absorb it all and leaves dusty traces. If this happens, add a little water until the dough absorbs the flour.
b.      The dough should be slightly sticky to the touch, not dried out, or too wet.
      6.    Knead dough vigorously for 2 minutes.
7.       Cover bowl with plastic wrap.
8.       Let sit on counter in a nested bowl with hot water (just like before) for 1 hour.
9.       Remove dough bowl from nested bowl.
10.    Remove plastic wrap from bowl.
11.   Separate dough into 12-15 medium or large balls.
12. Grab 1 dough ball and stick your index finger through the middle of the dough ball. Flatten dough around your finger to make a bagel ring.
13. Shape all the other dough balls the same way.
14. Once all bagel rings are made, add water to a large pot and bring water to a rolling boil.

15. Once water is boiling, preheat oven to 350 degrees F.
16. Add 3-4 raw bagel rings to boiling water.

17. Let bagel rings boil for 1- 2 minutes depending on how chewy you want your bagels. Flip bagels over half way through boiling (I use a straining spoon to flip them over). I like leaving mine in for about 2 minutes since I like my bagels very chewy. Your bagel dough should double/triple in size while boiling.

18. Use a straining spoon to remove the bagels from the boiling water.
19. Place boiled bagels on parchment paper lined baking sheet (or Silpat baking mat).

20. Bake bagels for 20-40 minutes flipping bagels over at the 10-15 minute mark. Depending on how thick you make your bagels.
21. Bagels will start to turn slightly golden brown on each side, this is perfect. If you are unsure if they are done, remove one bagel from the baking sheet and open it carefully with a knife (it will be hot!). Check if it is raw inside.

Thursday, June 5, 2014

S'sK Shortbread Cookies with Drizzled Chocolate

*A Sebastian’s Kitchen Original

Y
 

Shortbread Cookies with Drizzled Chocolate

Ingredients:
Cookie dough:
2 cups butter softened to room temperature
1 cup sugar
4 egg yolks
1 teaspoon vanilla extract
4 cups all-purpose flour

Topping:
5-10 oz Ghirardelli 60% cacao baking chips (dark chocolate)

Step 1: Cookie
1.    Add butter to a large bowl and beat it with a mixer until white and creamy about 2 minutes.
2.    Add sugar to butter and beat until fluffy. It should look thick like buttercream frosting.
3.    Add egg yolks and vanilla extract and continue to mix with electric mixer until batter is very thick.
4.    Add flour a little at a time and mix with mixer until mixer struggles. Continue incorporating batter by stirring and mashing with a fork until batter is doughy.
5.    Wrap dough in plastic wrap and place in the refrigerator to chill for about an hour or until dough is firm.
6.    Line baking sheet with parchment paper.
7.    Remove dough from the refrigerator.
8.    Add cookie dough to a rolling surface like a counter or a cutting board.
9.    Roll cookie dough flat and as thin as you like.
10.  Use cookie cutter to shape cookies.
    a.    I like using a heart cookie cutter - even after Valentine's Day.
    b.    Gently lift shaped cookie dough onto parchment paper lined baking sheet.
11.   Add the rest of the shaped cookie dough to baking sheet.    
12.    Preheat oven to 350 degrees F.
13.    Bake for 8-12 minutes until slightly golden brown. Time varies based on how thick you rolled out your cookie dough, the shape, and overall thickness of the cookie. Check the bottom of the cookies if you are unsure.
13.    When cookies are done baking, remove from oven and let sit until cool.
    a.    Let cookies sit until completely cooled to avoid them falling apart.
    b.    I slide the parchment paper full of cookies off of the hot baking sheet and let the cookies cool on the counter (on a dish towel if the counter is heat sensitive). Don’t try to pick up individual cookies as they are fragile and can break apart when warm. Leave the cookies on the parchment paper for decorating.

Step 2: Decorate
1.    Melt Ghirardelli chocolate according to package instructions.
    a.    I microwave mine in 20-30 second intervals stirring between each microwave session until melted.
2.    Add melted chocolate to a piping bag or piping bottle, or drizzle chocolate on cookies with a fork or spoon.

3.    Let decorated cookies sit out for about an hour until the chocolate sets.
4.    Store most of the cookies in the refrigerator in an air-tight container. If you are going to be eating them all soon, you can leave them all in an air-tight container at room temperature. I usually store most of my cookies in an air-tight container in the refrigerator and then get a few cookies out for the day and let those sit at room temperature in an air-tight container.