Wednesday, May 21, 2014

S'sK Black and White Striped Oreo Truffles

*A Sebastian's Kitchen Original Recipe inspired by the classic Oreo Truffles Recipe found on KraftRecipes.com
Check the original out here: Oreo Truffles Recipe. I've written the instructions out in my own words and added white and dark chocolate as a design. I've also changed the technique for dipping the chocolate. 

S'sK Black and White Striped Oreo Truffles inspired by the classic Oreo Truffles Recipe found on KraftRecipes.com

Ingredients:

1 family size package Oreo cookies 1 lb 3.1 oz (you will have leftover cookies, nom nom nom!)
1 8 oz. package Kraft Philadelphia cream cheese
1 bag Ghirardelli 60% Cacao Dark Chocolate Chips
1 bag Ghirardelli White Chocolate Chips

Step 1: Crush the Oreos
1. Remove 34 Oreo cookies from the package.
2. Place 5-8 cookies (depending on how big your processor is you can add even more in) in your food processor.
3. Chop cookies into a fine crumb.
4. Place crumbs into a medium bowl.
5. Continue crushing cookies until all (34) cookies have been crushed. Set bowl aside.


Step 2:  Cream cheese
1. Soften cream cheese in microwave about 15 seconds until soft but not melted.


Step 3: Putting it together
1. Add cream cheese to Oreo crumbs and stir with a fork until crumbs are absorbed and become a batter.
2. Cover Oreo batter bowl with plastic wrap and set in refrigerator for about an hour or two until batter has hardened.
3. Once hardened, remove batter bowl from the refrigerator and scoop out batter.
4. Line 2 baking sheets with wax paper.
5. Roll batter in your hands to form little balls. Place rolled balls onto wax paper lined baking sheets.
6. When you finish filling one baking sheet with truffle balls, place baking sheet in the refrigerator while you continue filling the second baking sheet.
7. When you finish filling up the second baking sheet with truffles, add that to the refrigerator and remove first baking sheet.
8. Open Ghirardelli dark chocolate bag and pour chips into a microwave safe bowl. Melt chips according to package instructions.


9. Pour chocolate on top of truffle balls or dip truffle balls in chocolate. Continue until all truffles on your first baking sheet are covered in chocolate. Put truffles in the refrigerator to harden while you melt your white chocolate (next step).

10. Melt white chocolate over a double broiler. *(Read my tutorial here). Once chocolate is melted remove second baking sheet with truffles from the refrigerator. Cover second baking sheet truffles in white chocolate. Save some white chocolate to drizzle over your first batch of chocolate covered truffles and make pretty designs.
11. Add white chocolate truffles baking sheet to refrigerator to harden for about 5 minutes.
12. Remove chocolate covered truffles from the refrigerator. Drizzle melted white chocolate on top of truffles to make pretty designs. I use a fork and just wave it around. You could also add white chocolate to a piping bag and use a round tip to pipe it on. Once you are happy with how they turned out, move your baking sheet with your finished truffles back into the refrigerator. Let sit for about 20 minutes or until they harden.

13. Remove white chocolate covered truffles from the refrigerator. Drizzle melted dark chocolate on top of white truffles to make pretty designs. 

14. Once you are happy with how they turned out, move your baking sheet with your finished truffles back into the refrigerator. Let sit for about 20 minutes or until they harden.
15. Remove baking sheets from refrigerator and remove Oreo truffles from baking sheets. Store truffles in an air-tight container in the refrigerator until ready to serve. Do not leave truffles out for more than a couple hours, remember they are made of cream cheese, and that goes bad fast!

Tuesday, May 20, 2014

S'sK Chocolate Chip Cookies (2nd Version)

*A Sebastian's Kitchen Original Recipe

This is my second version of my chocolate chip cookie recipe. I've changed a few things since my other version. Here's just a quick list of what I changed.

Removed whole wheat flour and adjusted all purpose flour
Adjusted white sugar and brown sugar

With this recipe, you'll need two bowls. A dry bowl for your dry ingredients (except sugars), and a wet bowl. You'll combine the dry bowl into the wet bowl at the end.


S'sK Chocolate Chip Cookies

Ingredients:
1 cup salted butter, softened to room temperature
1 cup white sugar
1 cup brown sugar
2 eggs
2 teaspoons vanilla extract
3 ¼ cups all-purpose flour
1 1/2 teaspoons baking powder
1 teaspoon baking soda
1/2 teaspoon salt
1 10 oz bag Ghirardelli dark chocolate chips

1.    Beat butter with a mixer until white and creamy.
2.    Add white sugar and brown sugar to butter bowl.
3.    Add eggs and vanilla extract; continue to beat until fluffy. Set aside.
4.    In a separate bowl add all-purpose flour, baking powder, baking soda, and salt. Mix well with a fork.
5.    Add dry bowl ingredients to wet bowl - mixing with a fork until dough forms.
6.    Add chocolate chips to the dough and fold them in with a fork or spatula gently.
7.    Line a baking sheet with parchment paper.
8.    Preheat oven to 350 degrees F.
9.    Spoon dough on to parchment paper and flatten dough with hand.

10.    Bake at 350 degrees for 8-10 minutes or until lightly golden on top. (Time depends on how big/thick you make your cookies.

Friday, May 9, 2014

S'sK Whipped Cream

*A Sebastian's Kitchen Original Recipe


S'sK Whipped Cream

Ingredients:
1 Quart Heavy Whipping Cream (2 pints)
2 cups powdered sugar
2 teaspoons vanilla extract

Instructions:
1. Place bowl you will be using and mixer attachments in the freezer to chill for 30 minutes before you start making your whipped cream.
2. Remove bowl and mixer attachments from the freezer. Add attachments to mixer.
3. Add heavy whipping cream to bowl.
4. Begin beating heavy whipping cream for 2 to 3 minutes until it starts thickening up.
5. Add vanilla and sugar and continue beating for another 3 to 5 minutes.
6. Cream should start to thicken up. As it thickens up, you should taste test it to make sure it is sweet enough for you. If you want it sweeter, add more sugar until you are happy with it.

7. Continue beating until you reach your desired thickness.

8. Make sure to eat within 3 days and store in an air-tight container in the refrigerator.

Monday, May 5, 2014

S'sK Snicker Salad

*This is my version of the classic Snicker Salad recipe.


Make sure to follow the 2 ½ cup of milk per package of jello pudding recipe on the back of the jello container to make your pudding thicker and not so watery.
Also... use whole milk instead of 2%.
I like to make my jello pudding the night before I make the salad so that the pudding sets and chills enough to become nice and thick.


Snicker Salad

Ingredients:
2 packages jello vanilla pudding mix
5 cups whole milk
2 cups washed and dried red grapes
4 granny smith apples (peeled and cubed)
9 full size Snicker bars (chopped/cubed)
Whipped cream (optional)

Day 1: Jello Pudding Mix
1. Follow instructions on back of pudding box to make thick pudding (pie filling). I made mine by adding the powder to a large bowl and adding 5 cups of whole milk and beating it with a whisk attachment with my hand held mixer for a couple of minutes.
2. Cover bowl with plastic wrap and chill overnight in the refrigerator to let pudding thicken up.

Day 2:
1. Remove grapes from stems and wash them thoroughly.
    a.    I like to dry my grapes using a salad spinner.
2. Set aside.
3. Wash, peel, and cube (in small cubes) granny smith apples. Set aside.
4. Cut Snicker bars into small pieces with a sharp knife.
    a.    I’ve tried having bigger chunks of Snickers in the salad in the past but once the Snickers get cold, the bigger chunks are a lot chewier and harder to eat.
5. Remove pudding bowl from the refrigerator.

6. Add grapes, apples, and Snicker bar pieces to the pudding. Mix well.


7. Serve in a serving dish.
8. Add a dollop of whipped cream to the serving dish. (Optional).

Wednesday, March 19, 2014

S'sK Fluffy Garlic and Mozzarella Cheese Bread Knots

*A Sebastian’s Kitchen Original Recipe


S'sK Fluffy Garlic and Mozzarella Cheese Bread Knots

Ingredients:
2 cups warm water
3 1/2 teaspoons active dry yeast
1 tablespoon white sugar
2 teaspoons salt
5 1/2 cups bread flour
2 tablespoons cornmeal
3 tablespoons butter, melted
2 tablespoons spice world – chopped garlic – or fresh garlic
Shredded mozzarella cheese to sprinkle on top of bread knots

Bonus items:
Parchment paper

1.    Add cold water into microwave safe bowl. (I use a glass microwave safe Pyrex measuring cup). Microwave water for about 1 minute until warm. Add water to a large bowl. (Water should be warmer than lukewarm, but not hot enough to slightly burn you.)

2.    Add yeast and sugar to water and stir with a fork to dissolve.
3.    Cover yeast bowl with plastic wrap and let yeast bowl sit in a nested bowl or Tupperware container with hot water.
    a.    To make a nested bowl with hot water:
          i.      I use a large Tupperware container and fill it about half way up with hot water.
          ii.      Nest the yeast bowl in the Tupperware container.
          iii.      Water should be hot, but not hot enough to burn you.
          iv.      (Remove yeast bowl from nested bath when kneading)
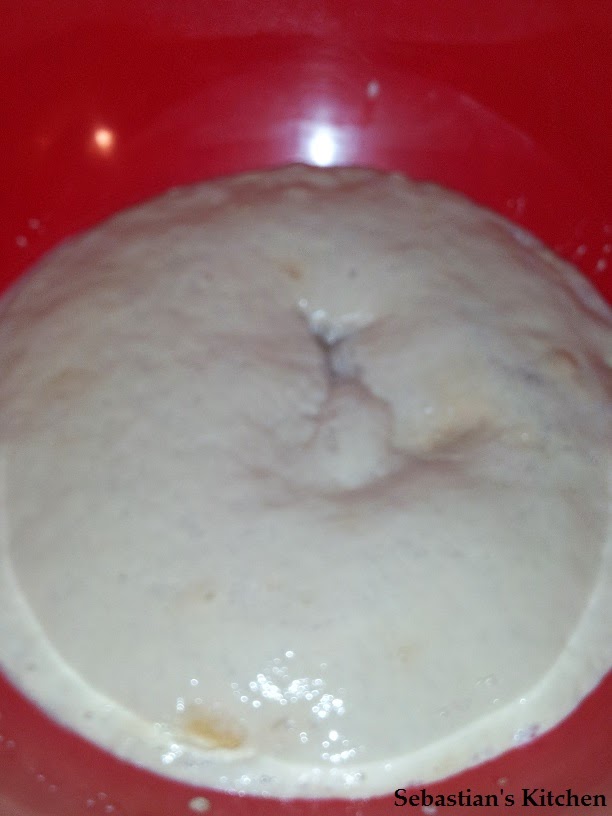
  b.    Let yeast sit in nested bath for 10 minutes. You will notice that your yeast water has become very thick, bubbly, and frothy. This is perfect. Remove bowl from nested bath and remove plastic wrap top.
  c.    If your bowl is not frothy, try again. There are many factors that could affect this. Most likely your yeast died or was not fresh to begin with.

4.    Add salt into bowl. Whisk with fork until well mixed.

5.    Add bread flour slowly. Mix with fork until difficult to mix. Knead dough with hands for a couple minutes until dough has absorbed all flour.
   a.    The dough should be slightly sticky to the touch, not dried out, or too wet.

6.    Cover bowl with plastic wrap.
7.    Let sit on counter in a nested bowl with hot water (just like before) for 1 hour.
8.    Check on water in nested bowl after 1 hour. It will probably be cold.
9.    Remove dough bowl from nested bowl.
10.    Knead dough for 2 minutes and cover bowl with plastic wrap.
11.    Refill water bowl with hot water and nest bowls again.
12.    Let rise for 1 more hour.
13.    Remove dough bowl from nested bowl.
14.    Empty water bowl.
15.    Remove plastic wrap from bowl.
16.    Start separating dough into 12-14 small balls.
17.    Line 1 baking sheet with parchment paper.
18.    Start preheating oven to 350 degrees F.
19.    Grab a cutting board and spread corn meal on it.
20.    Put dough balls on cutting board.
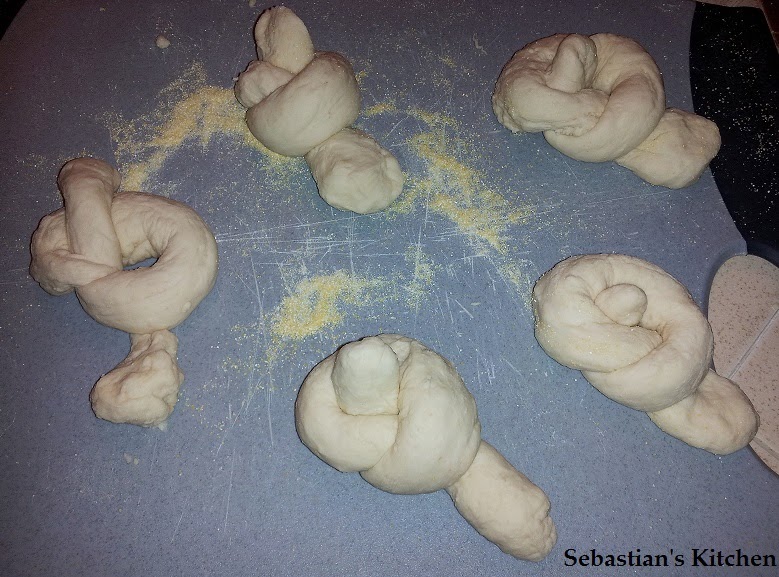
21.    Roll dough into long ropes.
22.   Tie each rope into a knot.
23.    Roll bottom of knot in corn meal.
24.    Place corn meal’d knotted dough on parchment paper.
25.    Once oven is preheated, set baking sheets in the oven.
26.    Round 1 of baking - bake knots for 10 minutes.
27.    At the 8 minute mark, start making the garlic and butter sauce.
    a.    In a microwave safe bowl, melt butter until just barely melted, (do not let it bubble/boil in the microwave).
    b.    Measure out your garlic and add it to your butter bowl and stir well.
28.    Once the first round of baking the bread knots are up, remove the bread from the oven and brush top of bread with garlic butter.  
    a.    I use a silicon cooking brush to spread the butter garlic mixture on. It works really well.

29.    Top with a thin layer of shredded mozzarella cheese.

30.    Continue baking for 10 – 20 minutes or until done baking. (Oven times will vary depending on your oven and on how thick you made your knots).
    a.    Bread will be done when it is firm and slightly golden.
31.    Remove bread from oven and turn off oven when bread is done baking.
32.    Store leftover bread in an air-tight container in the refrigerator.