Friday, March 14, 2014

S'sK Peanut Butter Oatmeal Crater Cookies with Nutella Dark Chocolate Filling

*A Sebastian's Kitchen Original Recipe


Peanut Butter Oatmeal Crater Cookies with Nutella Dark Chocolate Filling

Ingredients:

Wet bowl:
1 cup (2 sticks) butter (salted butter) softened to room temperature
1 ½ cups brown sugar
½ cup white sugar
2 eggs
1 ½ cups creamy natural peanut butter
2 teaspoons vanilla extract

Dry bowl:
1 cup King Arthur Flour Unbleached White Whole Wheat Flour
1 ½ cups all-purpose flour
½ teaspoon baking powder
½ teaspoon baking soda
2 cups old fashioned Quaker oats

Nutella Filling:
5 oz Ghirardelli 60% cacao baking chips (dark chocolate) (1/2 of a 10 oz bag)
½ cup Nutella

Step 1: Wet bowl
1.    Add butter to large bowl and beat it with a mixer until white and creamy about 2 minutes.

2.    Add brown sugar and white sugar to bowl and continue beating.
3.    Add eggs and continue beating.
4.    Add peanut butter and vanilla extract and beat until well incorporated.
5.    Set bowl aside.

Step 2: Dry bowl
1.    In a medium bowl add: whole wheat flour, all-purpose flour, baking powder, baking soda, and Quaker oats and mix with a fork or whisk.

Step 3: Putting it together
1.    Pour dry bowl contents into wet bowl half at a time and stir well with fork until well incorporated.

Step 4: Prep baking sheet, shape cookies, and bake
1.    Preheat oven to 350 degrees F.
2.    Line baking sheet with parchment paper.
3.    Put about 3-4 tablespoons worth of cookie batter on parchment paper.
4.    Flatten dough with your hand.
5.    Place your crater tool in the center of the cookie and squish your cookie dough up towards your tool creating a crater.
6.    Remove crater tool and pinch crater sides to make it look neater.
7.    Repeat steps 3 through 6 until all cookies are craters.

8.    Bake for 7-12 minutes or until cookie is done. Bottom should be slightly golden, the top may look a little under-cooked, but check the bottom of the cookie if you are unsure. Time varies a lot here based on how thick and how tall you made your crater cookies.
9.    Remove pan from oven and let cookies rest for 5-10 minutes then move to cooling rack.
10.    Once cookies have cooled, you can start to make your Nutella filling.


Step 5: Nutella Filling
1.    Melt Ghirardelli chocolate according to package instructions. Place it in a medium sized bowl.
    a.    I microwave mine in 20-30 second intervals stirring between each microwave session until melted.

2.    While chocolate is melting, measure out your Nutella and add it to your chocolate bowl once it is melted.

3.    Stir Nutella and chocolate mixture with a fork or a whisk until well incorporated.


4.    Using a large spoon or ice cream scooper, scoop Nutella filling in crater of each cookie.


5.    Let cookies sit at room temperature for 10 minutes, then transfer to the refrigerator for 30 minutes to an hour until chocolate filling is firm.
6.    Store most of the cookies in the refrigerator in an air-tight container. If you are going to be eating them all soon, you can leave them all in an air-tight container at room temperature. I usually store most of my cookies in an air-tight container in the refrigerator and then get a few cookies out for the day and let those sit at room temperature in an air-tight container.


Wednesday, March 5, 2014

S'sK Minestrone Soup

*A Sebastian's Kitchen Original Recipe


S'sK Minestrone Soup

Ingredients:
1 cup kidney beans uncooked (to be cooked separately)
12 cups water
1 teaspoon veggie bouillon jelly or 1 bouillon cube
1 bunch collard greens
1 bunch celery
2 leeks
3 medium fresh organic tomatoes diced
1 large can organic diced tomatoes
8 oz. small pasta
dried oregano to taste
dried basil to taste
salt to taste
pepper to taste
Shredded mozzarella cheese for topping on soup

Step 1: Cook kidney beans in a separate medium pot (approx. time 1 hour to 1 ½ hours)
1. Cook kidney beans according to instructions on product bag.
2. When beans are tender, strain from pot and rinse under cold water.
3. Store beans in an airtight container in the refrigerator until recipe calls for beans to be added to soup.
4. Need more bean cooking help? Check out my how to boil kidney beans post here.
Step 2: Veggie prep
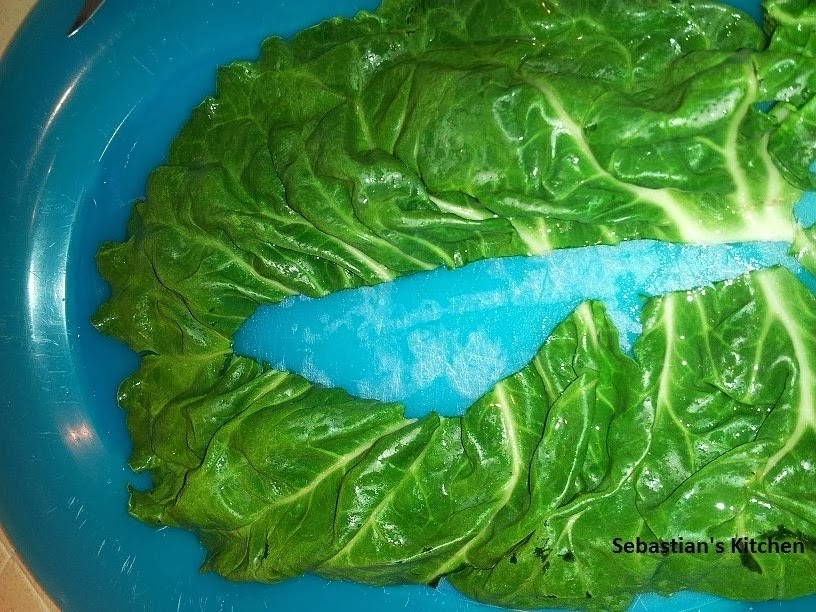
1. Wash collard greens.
    a. Cut off large center stems/veins of collard greens.

    b. Chop collard greens leaves. Set aside.
2. Wash and cut celery and leeks. Set aside.
3. Wash and dice fresh tomatoes. Set aside.

Step 3: Soup
1. Turn stovetop to medium-high heat.
2. Add all the water to a large pot.
3. Add veggie bouillon jelly or cube to water and stir well.
4. Add collard greens, celery, and leeks to water. Stir frequently.
5. When water begins to boil, lower heat to medium and simmer for 30 minutes stirring frequently.
6. Add freshly diced tomatoes and canned tomatoes and continue stirring occasionally.
    a. Simmer for an additional 10 minutes.
7. Add pre-cooked kidney beans to pot.
8. Add oregano, basil, salt, and pepper to taste.
9. Soup should start smelling and looking done. All veggies should be soft by now. Calculate how long the soup still has to cook, when you have about 10 minutes left, add the pasta.
10. Add small pasta to soup and continue to boil until pasta is cooked. Stirring frequently to prevent pasta from sticking to the bottom of the pot.
11. Once pasta is cooked, soup is done and ready to serve.

12. Pour soup into serving dish and top with shredded mozzarella cheese.  

Friday, February 28, 2014

Butter Cookies with M&Ms Adapted from mindybakes.com Recipe


I discovered this recipe on mindybakes.com. You can find the original recipe here: mindybakes butter cookies with M&Ms. Click on the link and check her website out.


Take the cookies out of the oven when they have a slight faint golden color on their edges. Don’t wait until they have a dark golden color around their edges as that is too long.


Butter Cookies with M&Ms Adapted from mindybakes.com Recipe

Ingredients:

2 cups butter, softened to room temperature
3 cups white sugar
4 eggs
2 tablespoons vanilla extract
6 cups all-purpose flour
1 teaspoon baking powder
2 teaspoons baking soda
½ teaspoon salt
2 large bags milk chocolate M&Ms

Step 1: Wet ingredients bowl
1.    In a large bowl, beat butter by itself (on medium high speed) until it is fluffy and turns slightly white. This will give the finished cookies an airy light texture.


2.    Add sugar to bowl and cream butter and sugar together until thick and fluffy.
3.    Add 4 eggs and vanilla extract and continue mixing.


4.    Once well incorporated stop mixing and set bowl aside.

Step 2: Dry ingredients bowl
5.    In a large bowl, add dry ingredients all at once.
    a.    Add flour, baking powder, baking soda, and salt.

6.    Stir with a fork until ingredients are distributed well.

Step 3: Putting it together

7.    Add dry ingredients bowl to wet ingredients bowl a little at a time and start beating with mixer on medium.

8.    Continue beating until dough gets too thick that mixer struggles.

9.    Use a fork to continue beating and mixing the dough by hand.

10.    Once dough is finished, refrigerate bowl for 45 minutes to let dough harden.

Step 4: Prepare to bake

11.    Line a baking sheet with parchment paper.

12.    Place about a tablespoon worth of dough per cookie on baking sheet and press flat gently.

    a.    Leave a lot of space between cookies as they will double in size.

    b.    When cookies are done being placed on baking sheet, add M&Ms by hand and press them into the dough. They may seem like they are kind of close together, don’t worry, they’ll spread out during baking.

    c.    You can alternatively roll dough balls in a bowl of M&Ms… I like doing it by hand better as it looks neater when finished.


14.    Preheat oven to 350 degrees F.

15.    Bake for 6-8 minutes until cookies are slightly golden around the edges.


Wednesday, February 19, 2014

S'sK Potato Gnocchi


 *A Sebastian's Kitchen Original Recipe 


S'sK Potato Gnocchi

Ingredients:
2 cups potato puree
2 cups all-purpose flour
1 large egg

Day 1:
Step 1: Potato prep and boil
1.    Rinse, peel, and cube potatoes. (I usually double/triple the recipe so I boil an entire 5lb bag of potatoes all at once.)
2.    In a medium pot, boil potatoes until tender and fork goes through easily. About 30 minutes depending on how thick you cut your potatoes.
3.    Drain. Set aside to cool for 10 minutes.
4.    Put cubed potatoes in an air-tight container and refrigerate overnight.

Day 2:
Step 2: Gnocchi dough
1.    Remove potatoes from refrigerator and air-tight container and add potatoes to a large mixing bowl.
2.    Grab a fork or a potato masher and mash the potatoes until not lumpy. You now have potato puree.
3.    Measure potato puree in a glass Pyrex measuring cup. We want 2 cups of puree for this recipe.
    a. If you have left over puree (anything past 2 cups), you can set that aside and use that to make real mashed potatoes or make more gnocchi and freeze it! When I use my extra puree, I continue measuring it 2 cups at a time so I know how much flour to add.


4.    Add 1 large egg to the potato bowl.
5.    Add flour 1 cup at a time and mix well with a fork.
6.    Continue adding flour until potato puree turns doughy but is still sticky and wet, dough should be mostly workable.
7.    Add flour to a baking sheet and roll pieces of dough in flour into a rope.
8.    Cut small pillows off of rope.
9.    Shape into gnocchi with a fork.

10.    Boil for about 5 minutes or until gnocchi have been floating for about a minute or until cooked.
     a.    Boil gnocchi in batches and save water between each batch.
     b.    Use a straining spoon to help get gnocchi out of pot once cooked.
11.    Top with butter and mozzarella cheese or your favorite sauce – try it with fresh Alfredo sauce or my special creamy white sauce recipe, Yum!


Thursday, February 6, 2014

S'sK Favorite Buttercream Frosting

*A Sebastian's Kitchen Original Recipe


Sebastian's Kitchen Buttercream Frosting

Ingredients:
1/2 cup salted butter softened to room temperature
1/2 cup un-salted butter softened to room temperature
2 tablespoons heavy whipping cream
1 tablespoon vanilla extract
3 1/2 cups powdered sugar
a pinch of salt to taste
Gel dye for dying colors (optional)

Directions:
1.    Unwrap softened butter from wrappers.
2.    Set butter into large mixing bowl.
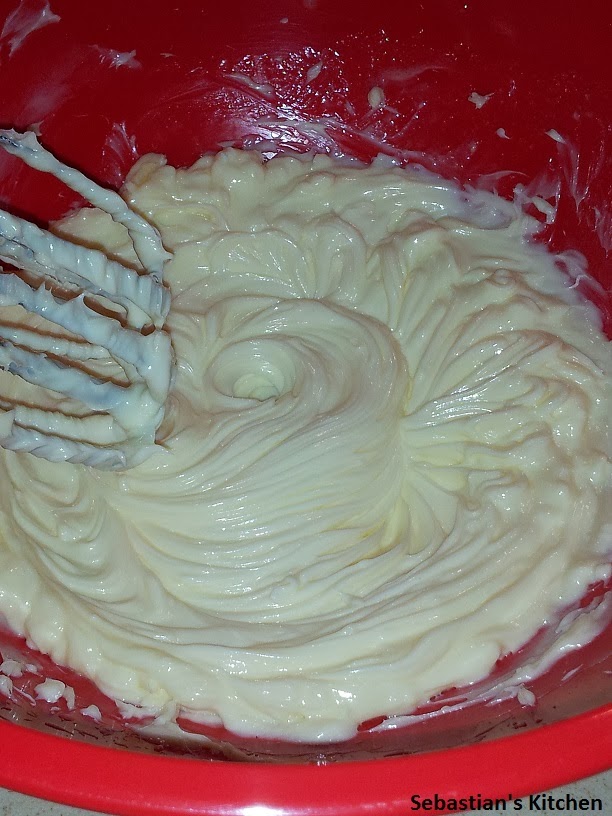
3.    On medium high speed, beat butter in mixer for about 5-7 minutes until butter turns white.
    a.    Scrape sides of bowl with spatula often.
4.    Add heavy whipping cream and vanilla extract.
5.    Beat for 3-5 minutes.
6.    Add powdered sugar 1 cup at a time.
    a.    Stir with a fork first and then use the mixer to avoid spilling powdered sugar everywhere.
7.    When frosting starts to thicken up, add salt, and add gel food dye (optional).
    a.    Only use a little gel dye or it will make your frosting taste bitter.
    b.    If you are making different colored frosting, separate frosting and then add dye gel to separate bowls.

8.    Continue beating frosting until it is finished.


    a.    Once frosting starts to thicken up, taste test to make sure just the right amount of salt is in the frosting. If it is too salty, add more heavy whipping cream and powdered sugar and continue beating.
    b.    Frosting should have a thick and airy consistency. It will hold the shape of piping tips very well. If your frosting is too runny, refrigerate a little to harden up.


9.    Scoop frosting into piping bag.
10.    Pipe frosting onto each cupcake in whatever design you want.
11.    Set frosted cupcakes in an air-tight container and refrigerate until ready to eat.
12.    If you prefer warmer cupcakes, you can leave them room temperature up to 3 hours before eating. Again make sure they are in an air-tight container.

Wednesday, February 5, 2014

S'sK Chocolate Chip Cream Cheese Filled Chocolate Cupcakes

*A Sebastian's Kitchen Original Recipe

*Makes about 32 cupcakes.

Chocolate Chip Cream Cheese Filled Chocolate Cupcakes

Ingredients

Filling:
1 (8 ounce) package Philadelphia cream cheese, softened
1 egg
1/3 cup white sugar
1/2 bag (5 oz) Ghirardelli miniature semisweet chocolate chips

Cupcakes:
3 cups all-purpose flour
2 cups white sugar
1/2 cup SACO Dutch processed cocoa powder
2 teaspoons baking soda
1 teaspoon salt
2 cups water
2/3 cup canola oil
2 teaspoons vanilla extract

Directions
1.    Line cupcake tins with cupcake paper cups.
2.    In a microwave safe bowl soften cream cheese slightly for 10-20 seconds in the microwave. (Don’t melt it completely; we still want it to be solid but soft).
3.    Add softened cream cheese, egg, and white sugar to a medium bowl. Beat until creamy.

4.    Add chocolate chips and stir.
5.    Cover bowl with plastic wrap and set in refrigerator while you mix the cupcake batter.
6.    In a large bowl, mix together dry ingredients: flour, white sugar, Dutch processed cocoa, baking soda, and salt.

7.    Make a well in the center of the bowl with dry ingredients and add the wet ingredients to the center of the bowl: water, canola oil, and vanilla extract.

8.    Stir wet and dry ingredients together with a fork just until batter is well incorporated. Do not over stir batter.
9.    Refrigerate batter for 5 to 10 minutes to thicken batter for scooping into cupcake tin cups.
10.    Preheat oven to 350 degrees F.
11.    Fill cupcake tins a little over 2/3 full with cupcake batter.

12.    Add about a half a tablespoons worth of cream cheese filling on top of the batter right in the center of the cupcake.

13.    Bake for about 20-30 minutes or until tester comes out clean from batter. Baking time varies depending on the thickness of the batter in the cupcake tin.
    a.    Test one cupcake to see if it’s done by poking the cupcake with a toothpick or cake tester. If your tool comes out clean then your cupcake is done.
    b.    If you put the tester through the cream cheese filling, it will be sticky, so make sure to test the actual cupcake and not the filling as melted chocolate from the chocolate chips can throw off your results and make the cupcake appear to be underdone because the chocolate is melted and oozy.
 

14.    Let cupcakes cool at room temperature. If you are going to frost the cupcakes, do not do it while they are still warm or your frosting will melt! Once my cupcakes reach room temperature, I put them in the refrigerator to get cold before frosting.